

Overview
You can control which products display a label based on their inventory status.
For example, you can show a label only on products that are in stock, out of stock, or have a specific amount of inventory remaining.
This guide explains how to set up inventory-based conditions for your labels.
How do I set an inventory condition?
Step 1. Open the label settings
-
Go to Labels and open the label you want to configure, or create a new label.
-
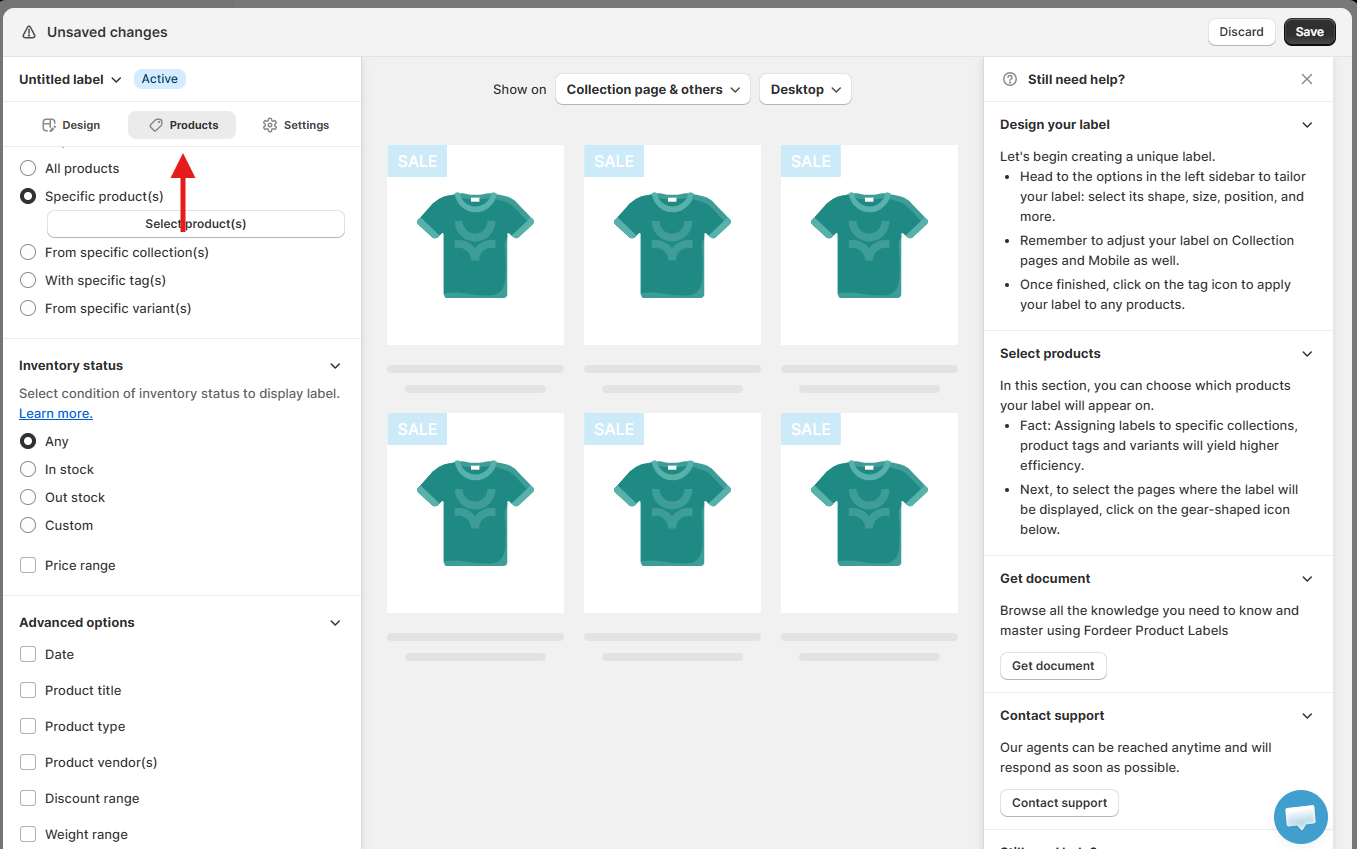
Then, select the Products tab from the left sidebar.
Step 2. Choose which products the label applies to
-
First, select the products you want to apply the label to.
-
Then, scroll down to Inventory status.
Tip: Product targeting and inventory conditions can be used together to control more precisely where your label appears.
Step 3. Select an inventory status
Under Inventory status, choose one of the following options:
-
Any: Display the label regardless of the product's inventory status.
-
In stock: Display the label only when the product is in stock.
-
Out stock: Display the label only when the product is out of stock.
-
Custom: Set a specific inventory quantity condition for the label.
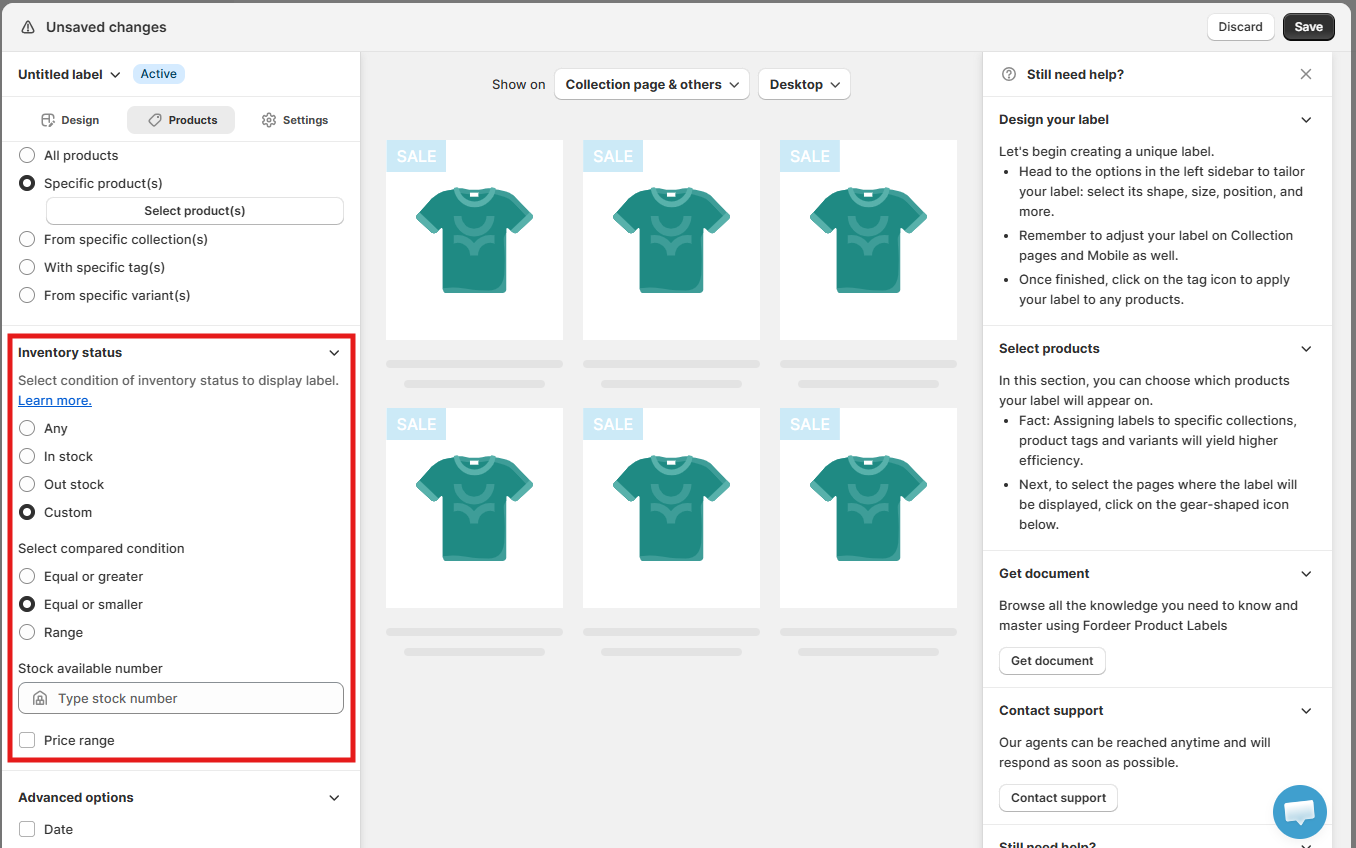
If you select Custom, choose one of the following conditions:
-
Equal or greater: Display the label when the available stock is equal to or greater than the number you enter.
-
Equal or smaller: Display the label when the available stock is equal to or smaller than the number you enter.
-
Range: Display the label when the available stock falls within the range you set.
Then, enter the quantity in Stock available number.
For example, select Equal or smaller and enter 5 to display the label when a product has 5 or fewer items in stock.
Tip: Use Custom conditions to create inventory-based messages such as “Low stock” or “Only a few left.”
Can I combine inventory status with other conditions?
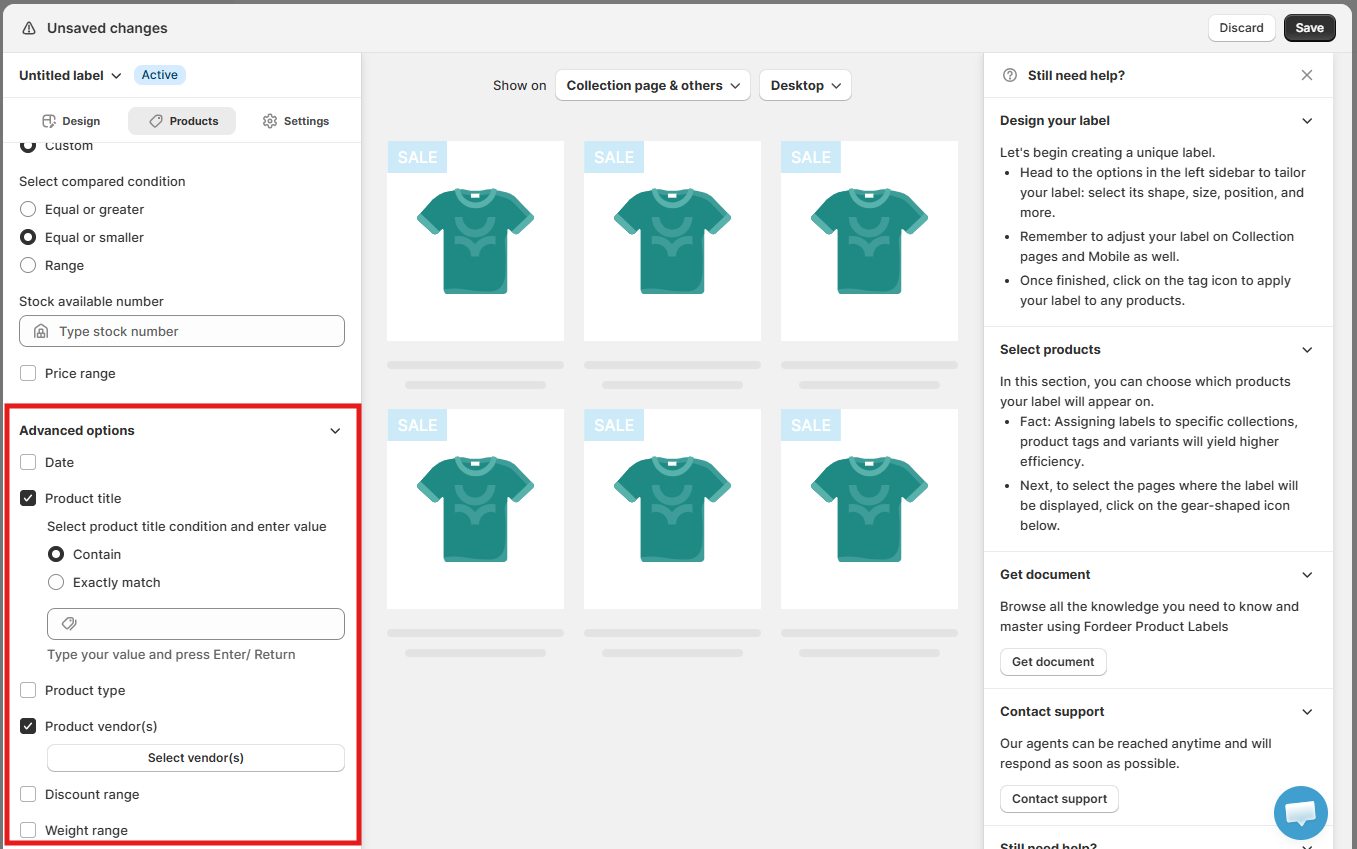
Yes. You can combine Inventory status with other product conditions available in the Products tab.
For example, you can also enable Price range or use the conditions under Advanced options to further control which products display your label.
If you want to explore additional conditions, please check out the related articles below:
Before saving your label
Before you finish, make sure:
-
The correct products are selected.
-
Your Inventory status condition is configured correctly.
-
Any additional product conditions are set as needed.
-
The label appears correctly in the preview.
Once everything is ready, click Save in the top-right corner to apply your changes.
Important: If multiple product conditions are applied, make sure the conditions match the products where you expect the label to appear.
We value your feedback — it helps us continuously improve ForDeer and provide you with a better experience.
🖥️ Demo store: Check out here with password: 1
👉 Chat with us: Share your feedback directly with our team.
👉 Email us: support@fordeercommerce.io
👉 Explore more apps: Discover more ForDeer apps.
👉 Join our community: Join ForDeer Community to get the latest updates, tips, and special deals.
🕐 Working hours: 8:30 AM – 5:00 PM (UTC+7), Monday–Friday.
We typically reply to live chats within minutes and emails within a few hours.
Need help? Feel free to reach out anytime via live chat or email!